Although Adobe Photoshop is well recognized for its graphic design and photo editing features, many artists are shocked to discover that it also has strong video production and editing skills. A great tool for making short films, animations, social media clips, and motion graphics, but it might not be able to fully replace full-scale video editors like Premiere Pro or After Effects. Frequently used by designers, marketers, and content producers because it enables them to integrate text, graphics, and simple animations within a recognizable interface.
Offers all the necessary tools in one location, whether you want to make slideshow-style material, Instagram reels, banner animations, or promotional movies. Video editing is made simple by its timeline feature, especially for people who are already familiar with layers. This comprehensive tutorial will lead you through every step of making a film in Photoshop, from project setup to exporting the finished product. FITA Academy is the best choice for learning Adobe Photoshop, delivering expert instruction with hands-on creative projects and industry-focused design training.
Understanding Photoshop’s Video and Timeline Features
It’s crucial to comprehend how Photoshop handles video editing before making framework. Timeline panel lets users manipulate audio tracks, animations, and video frames. In contrast to conventional video editors, Photoshop handles video clips as layers, making the application of filters, masks, and modifications simple. Although you can work in either Frame Animation or Video Timeline mode, when making videos, the Video
The best option is Timeline. It lets you import audio, video, and picture clips and adjust their order and duration. Layer-based effects, text animations, opacity adjustments, and simple video transitions are all supported by Photoshop. Additionally, the timeline allows you to synchronize music and graphics and zoom in for exact editing. You may efficiently plan your video and prevent misunderstanding during editing if you are aware of these elements.
Preparing Images, Text, and Assets for Video
The secret to making a seamless Photoshop video is preparation. Organize all of the resources you intend to use, such as text, background graphics, logos, and images. Prevent scaling problems later, make sure your photos have a good resolution and a constant size. Ensure visual consistency, choose fonts, colors, and alignment in advance if you intend to use text. Dividing your film into scenes or sections, such as an opening, major material, and outro, is beneficial for animations. Make your files easy to recognize when imported into Photoshop, give them unambiguous names. Make sure the audio is properly formatted and cut if you’re adding it. Time is saved and you can concentrate on creativity rather than troubleshooting when editing thanks to this preparation phase. Photoshop Classes in Chennai train learners in image editing, graphic design tools, creative workflows, and practical projects aligned with industry standards.
Creating a New Video Project in Photoshop
In Photoshop, launch the program and select File > New to begin a video project. Get canvas size according to the platform you plan to use, such as 1920 x 1080 for YouTube or 1080 x 1080 for Instagram. Identify RGB color option and set the resolution to 72 or 108 pixels per inch. When the canvas is prepared, click Window > Timeline to bring up the Timeline panel, then choose Create Video Timeline.
By doing this, you transform your workspace into a setting for editing videos. Layers display as video tracks in the timeline bar at the bottom. Images and movies can then be imported by simply dragging them onto the timeline or canvas. Makes it simple to organize and manage your video footage by automatically placing each item on its own track.
Adding and Editing Video Clips, Images, and Text
You can start adding content to your video after setting up your timeline. Drag photos and video clips into the timeline window to import them. By sliding the layer bar’s boundaries, you can change the length of each clip. Choose the Text Tool, type your text, then arrange it on the canvas to add text. You will be able to control when the text layer appears and vanishes in the timeline.
To change the order, you can move clips along the timeline. Like photos, video layers can be resized, rotated, and adjusted in Photoshop. It is simple to experiment with layouts and transitions while retaining creative control thanks to this layer-based approach. The Training Institute in Chennai offers a Photoshop program focusing on image editing fundamentals, creative design tools, photo manipulation, visual effects, and hands-on practical projects.
Applying Animations, Transitions, and Effects
Once your timeline is set up, you can begin adding stuff to your video. To import images and videos, drag them into the timeline window. By sliding the layer bar’s boundaries, you can change the length of each clip. Choose the Text Tool, type your text, then arrange it on the canvas to add text. You will be able to control when the text layer appears and vanishes in the timeline.
Additionally, Photoshop offers filters and adjustment layers that can be used to style and correct color in video footage. Even while the effects are not as sophisticated as those found in specialized video software, they are more than adequate for motion graphics, commercial content, and social media videos. You can maintain a clean, polished video by using animations sparingly.
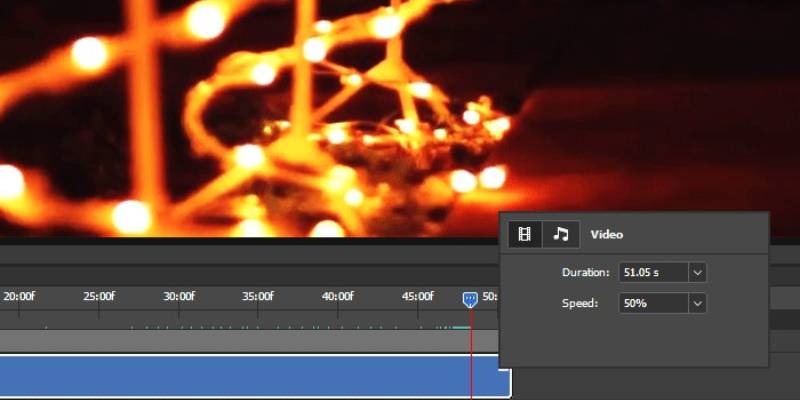
Working With Audio and Timing
Your movie can be greatly improved by adding sounds. You may import audio files straight into the timeline in Photoshop. After the audio track is added, it can be trimmed, volume levels can be changed, and graphics and sound can be synchronized. For a finished effect, it’s crucial to match animations and transitions with beats or significant audio points. Adjust timing and guarantee seamless synchronization, use the timeline zoom tool. We should also learn about the AI features in Photoshop to improve our skills.
Additionally, Photoshop allows you to mute specific tracks while editing, which is useful while concentrating on images. Prevent music from overpowering voiceovers or text animations, maintain balanced audio levels. A basic video can be transformed into a polished piece of content with the right pacing and audio management.
Exporting and Optimizing the Final Video
It’s important to export your video appropriately after it’s finished. Access the export settings, select File > Export > Render Video. Select a format that is widely supported across systems, like MP4. Choose a preset according to the platform you want to use, such as social networking or YouTube. To balance file size and visual clarity, change the resolution, frame rate, and quality settings. Errors can be found by previewing the result in Photoshop before rendering. Check the video’s compatibility on various devices after it has been exported. Better viewer engagement and quicker loading times are guaranteed by proper optimization, particularly on mobile platforms.
Common Mistakes and Tips for Better Results
A common error made by novices is to overuse animations and effects in their videos. Remain professional, keep your design simple and targeted. Identify timing or alignment problems, always preview your video before exporting. Maintain the correct placement of pieces, use grids and guides. Stop data loss, save your project often. Another useful advice is to use simple typefaces and contrasting colors to keep content readable. Short videos are ideal for Photoshop, so steer clear of lengthy timeframes since they may cause performance issues. You may confidently and effectively produce high-quality videos by adhering to these best practices.
Photoshop as a Creative Video Tool
For designers and content producers who wish to create visually appealing videos without mastering complicated tools, Photoshop is a useful and accessible solution. Well-known interface, layer-based editing, and robust timeline tools make creating videos easy and adaptable. You can confidently produce films for marketing, social media, and creative projects by following this detailed instruction. Useful addition to your toolkit for creating videos since you will learn new methods to integrate design and motion as you acquire experience.